Smoke and heat alarms are essential for your home’s fire safety. They are designed to alert you quickly to potential dangers, but sometimes they can be confusing when they beep unexpectedly or activate without an obvious fire. Knowing the difference between a warning chirp and a full alarm, and how to troubleshoot, is key.
⚠️ IMPORTANT SAFETY NOTE: NEVER ignore a smoke or heat alarm sounding a full alarm. Always assume there is a real fire or danger. If you hear a continuous, loud alarm, evacuate your home immediately and call emergency services once you are safely outside. Only investigate if you are certain there is no fire and it’s a false alarm after following all safety protocols.
Part 1: Smoke Alarm Beeping (Chirping) – Warning Signals
A smoke alarm that emits an intermittent “chirp” or “beep” (typically every 30-60 seconds) is usually not detecting smoke or heat. Instead, it’s telling you something about its own status.
Common Causes of Smoke Alarm Beeping (Chirping):
Description: This is by far the most common reason. As the battery (for battery-powered alarms or the backup battery in hardwired alarms) loses power, the alarm “chirps” to warn you it needs replacement. This often happens in the middle of the night when temperatures drop, affecting battery performance.
Symptom: A short, distinct chirp every 30-60 seconds.
Description: Smoke alarms have a lifespan, typically around 8-10 years from the date of manufacture. After this period, their sensors can degrade, and they are designed to signal that they need replacing (often with a specific beeping pattern or a series of chirps).
Symptom: Often a similar chirp to a low battery, but it continues even after a new battery is installed. Check the manufacture date on the back of the unit.
Description: Over time, dust, insects, or cobwebs can accumulate inside the alarm’s sensing chamber, interfering with its ability to detect properly. This can trigger nuisance chirps or even false alarms.
Symptom: Intermittent chirping, sometimes seemingly random, not stopping with battery change.
- Description: Rapid changes in temperature or high humidity (e.g., from a steamy shower, cooking near the alarm, or even extreme weather) can sometimes cause condensation or interfere with the sensor, leading to chirping or false alarms.
Symptom: Chirping occurs around specific activities (showering, cooking) or during certain environmental conditions.
- Description: If the battery isn’t seated correctly in the compartment or if the battery pull tab (on new units) hasn’t been removed, the alarm may read it as a low or missing battery.
- Symptom: Chirping immediately after battery installation.
Description: Less common, but a manufacturing defect, loose wiring connections, or electrical surges in hardwired systems can sometimes cause a unit to malfunction and chirp.
Symptom: Persistent chirping despite all other troubleshooting, especially if it’s a hardwired unit.
Troubleshooting Beeping Smoke Alarms:
Listen carefully to pinpoint which specific alarm is chirping. If they’re interconnected, all might chirp, but only one is the source.
For battery-only alarms: Remove the old battery and insert a fresh, new one of the correct type (usually 9V, AA, or AAA, depending on the model).
For hardwired alarms with battery backup: Locate the battery compartment and replace the backup battery.
Ensure the battery is inserted correctly and the compartment door is securely closed.
Always use good quality, fresh batteries. Note the date you changed them.
Carefully remove the alarm from its mounting bracket (usually a twist-off).
Use a soft brush attachment on a vacuum cleaner or a can of compressed air to gently clean around the vents and inside the sensing chamber. Do NOT use water or cleaning solvents.
Reattach the alarm securely to its mounting base.
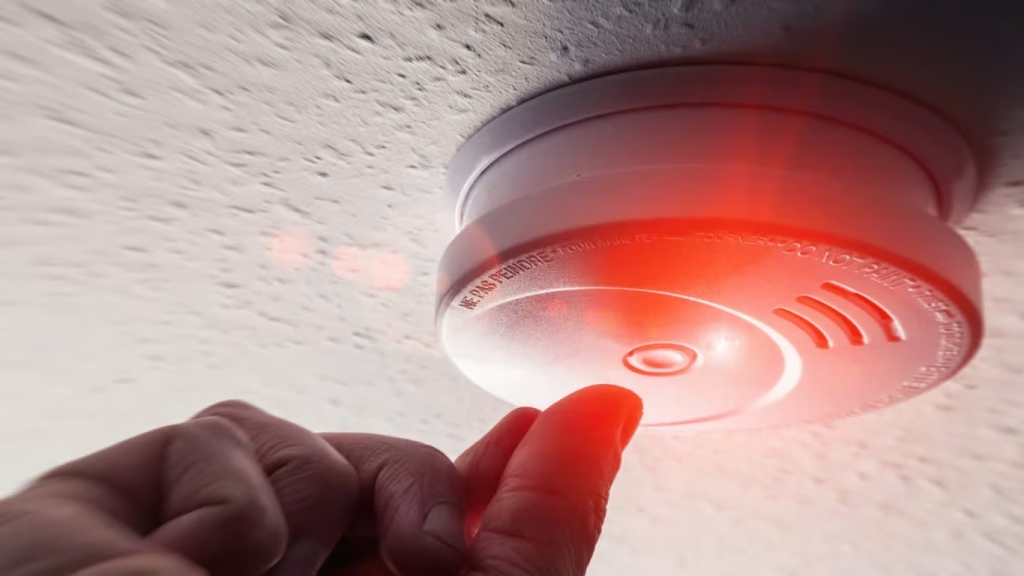
After changing batteries and cleaning, most alarms have a “Test/Reset” button. Press and hold it for 15-20 seconds until you hear a different sound (e.g., a long beep) indicating it has reset.
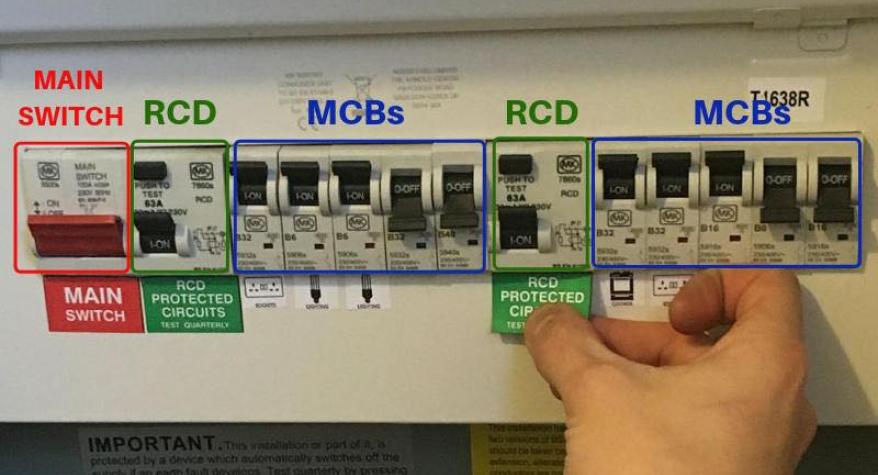
For hardwired alarms, you might need to temporarily turn off the power to the smoke alarm circuit at your consumer unit for a few minutes, then restore it, and then press the reset button.
Look for the “replace by” or manufacture date on the back of the alarm. If it’s over 8-10 years old, it’s time to replace the entire unit.
If the alarm is frequently chirping due to steam or cooking fumes, consider relocating it slightly further from the source or installing a heat alarm (which responds to temperature, not smoke) in high-steam areas like kitchens or bathrooms.
Part 2: Smoke or Heat Alarm Activating (Full Alarm)
A full alarm activation means the device has detected what it’s designed to detect: smoke or a rapid rise in temperature indicative of a fire. Your immediate priority should always be to assume it’s a real fire.
- Unlike smoke alarms, heat alarms are specifically designed to detect a significant increase in temperature or a fixed high temperature.
- They are typically installed in kitchens, garages, and lofts where smoke alarms might frequently trigger false alarms due to cooking fumes, car exhaust, or dust.
- Heat alarms are primarily for property protection, as they react slower than smoke alarms. You should always have smoke alarms in hallways, landings, and near sleeping areas for life safety.
Common Causes of Smoke/Heat Alarm Activation (Full Alarm):
Description: This is the purpose of the alarm. It has detected smoke from a fire, or a dangerous rise in temperature (for heat alarms).
Action: EVACUATE IMMEDIATELY. Don’t investigate. Get out, stay out, and call emergency services.
Description: Smoke from burnt toast, grilling, frying, or even heavy cooking fumes can trigger a smoke alarm, especially if it’s too close to the kitchen or not adequately ventilated.
Symptom: Alarm activates during or shortly after cooking.
Action: Ventilate the area (open windows/doors) carefully if safe. Use the “Hush” button on your alarm (if equipped) to temporarily silence it.
Description: Dense steam from a hot shower, a boiling kettle, or a humidifier can be mistaken for smoke particles by ionization smoke alarms.
Symptom: Alarm activates when using the shower, boiling water, or doing laundry.
Action: Improve ventilation in bathrooms and kitchens. Close bathroom doors when showering.
Description: A heavy build-up of dust, dirt, or even small insects getting into the sensing chamber can cause a false activation. This is more common if the alarm hasn’t been cleaned recently.
Symptom: Random activation without an obvious cause.
Action: See “Troubleshooting Beeping Alarms” step 3 (cleaning).
Description: Strong fumes from cleaning products, paint, pest sprays, or even hairspray can sometimes trigger sensitive smoke alarms.
Symptom: Alarm activates after using such products.
Action: Ventilate the area when using strong chemicals.
Description: As alarms age (beyond 8-10 years) or if they have internal defects, they can become overly sensitive or malfunction, leading to false alarms.
Symptom: Frequent false alarms without a clear cause, even after cleaning and battery replacement.
Troubleshooting a Fully Activated Smoke or Heat Alarm (When You're Certain There's NO Fire):
Most modern alarms have a “Hush” or “Silence” button. Press it firmly. This will temporarily silence the alarm (usually for 5-15 minutes) to give you time to investigate.
Do NOT remove the battery or disconnect the alarm unless you are absolutely sure there is no fire.
If there’s no “Hush” button, you may need to briefly remove the battery (for battery-only units) or turn off power at the consumer unit for the alarm’s circuit (for hardwired units) to silence it. Reconnect/restore power immediately after.
Look for obvious sources like burnt food, excessive steam, or fumes.
Check for dust build-up (see cleaning steps above).
Note if it happens at a specific time of day or during a particular activity.
(As described in “Troubleshooting Beeping Alarms” step 3).
Open windows and doors to clear any lingering smoke, steam, or fumes.
(As described in “Troubleshooting Beeping Alarms” step 4).
General Electrical Safety Tips for Smoke & Heat Alarms:
Press the “Test” button on each alarm monthly.
For battery-only alarms or backup batteries in hardwired units, replace them at least once a year (e.g., when clocks change).
Check the manufacture date on the back of your alarm. Alarms don’t last forever.
Ensure smoke alarms are installed on ceilings, centrally in rooms or hallways, at least 30cm from walls/lights. Avoid placing smoke alarms directly in kitchens or bathrooms; use heat alarms in these areas instead.
For better safety, consider having interconnected smoke and heat alarms (where one alarm sounding causes all others to sound).
For hardwired systems, or if you’re unsure about installation or advanced troubleshooting, always consult a qualified electrician.
For hardwired systems, or if you’re unsure about installation or advanced troubleshooting, always consult a qualified electrician.
If your smoke or heat alarm is frequently giving false alarms, or if you suspect it’s faulty after troubleshooting, do not disable it. Instead, contact a qualified electrician from FE Maintenance. Your safety depends on a properly functioning alarm system.
For expert advice on smoke and heat alarm installation, maintenance, or troubleshooting in London, contact FE Maintenance today